Pages

Tuesday, October 29, 2013

Electricity and Spray Paint

I'm sorta the worlds biggest scardy cat. I'm afraid to take things out of the oven because I don't want to get burned, I hate heights, and I basically think the house is going to fall down around us at any point.  So having to take a light off the wall and touch the wiring was up there on my don't do it or you'll die list. However, my desire to wallpaper the bathroom eventually won out and I decided that the itty bitty baby light in the bath room couldn't do me too much harm?
The first step involved figuring out which switch to flip on the circuit breaker to cut the electricity to the bathroom. That basically meant I opened the bathroom window while MLW started flipping switches      in the garage. When the bathroom light went out I yelled "got it" and thats how we figured out that switch 18 cuts out the power in all the bedrooms and the the guest bath. But ironically not the hallway? Electricity is weird.


I made the sure the switch on the wall was turned off as well and then basically just unscrewed the light fixture and pulled it off the wall. There were only 2 wires I had to detach, noting black went to black and white to white. So far, pretty easy. 


The hardest part was probably cutting the wallpaper around the opening. I did a pretty wonky job, but luckily the fixture covers any of the crazy edges. 


I let everything get nice and dry before I even thought of turning the electricity back on. Then I took a look at the light fixture. The shape and size of it worked fine, but I had been a little messy with the kilz when I primed a few months back. So guess what? I decided to spray paint it gold. I had a can of the Krylon Metallic in Brilliant Gold laying around with just enough left for a few coats. 


This is what the original fixture looked like, see the white paint peeking around the edges? I'm a messy painter what can I say. 


Boom. Gold. 


A few hours later once the paint had dried, I just did everything I did to take the light down in reverse. Then I fliped the breaker back on and gave her a go. Light! And no burning smell! And I didn't get electrocuted or die! This gave me a little more confidence with switching out lights, so now I'm hoping I can handle most of them as we start to upgrade them throughout the house. Stay tuned..

Thursday, October 24, 2013

The whole house

I had the BBJ girls over for a pumpkin paintin' party the other night which made me whip into shape and clean the whole house. Everything looked so pretty that I decided it was time to take a 3 month full house photo shoot. Lets go... *warning: long post*


Welcome! I'm excited to report that the wonky entryway light's days are numbered. Joss and Main had a pretty awesome lighting sale the other week and I scooped up two new fixtures. I've got a few more artsy items to add and a key ring, but I'm pretty close to satisfied. The front door might have a destiny with paint one day soon too...


The famous church bench sits to the right of the front door. It still needs to be sanded and refinished but so far its been a cozy little spot to drink a glass of wine and spy on the neighbors. (check out the grey pumpkin. I died when I saw him and he had to come home)


The living room is also looking pretty good, we have been hanging out in the den so much I keep forgetting to update ya'll on its progress.  


My little corner office. The desk belong to MLW's great grandma and its nice to have a Watts family heirloom in the house. Plus all those drawers=awesome storage. 


The bar cart is probably one of my favorite pieces of furniture we own along with the coffee table, wingback chairs and almost everything else I find on craigslist. Basically I like anything we have that has a little extra history. The bar cart was an etsy find and came from Portland on a Grey Hound Bus. I kid you not. I had to go to probably the sketchiest part of town to pick her up but it was totally worth it. Apparently Grey Hound ships large items cross country for relatively cheap, you just have to drop it off and pick it up at your nearest station. 


Wall art collage in prgoress. The frame on the floor is destined to be painted gold (surprise!) and I need to hang up my deer skull. The wall light was a super cheap Target find. Eventually I would like to make it battery powered, but I think it adds a little art gallery feel to the wall. Plus it highlights a dodging card made special by a favorite professor who passed away not to long after giving it to me. 


Large dinning room, little dinning table. I promise this will be resolved eventually. I've got a 6 seater craigslist table in the garage that is waiting for a paint/ stain decision and then things should start to look a little more like the correct scale. I think the rug may end up in the kitchen as a runner as well. I have zero idea as to what kind of rug I would replace it with? 


The kitchen still looks the same. Bleh.


More bleh. 


The epically transformed right side of the den.


The epically un-transfomred left side of the den. (Hey MLW!)


And down the hallway. Photos on the floor, soon to be on the walls (hopefully). 


Guest room 1 (again).


Guest room 1's craiglist chair and awesome giraffe planter. 


The freshly wallpapered hall bath. I'm still slightly afraid that this was a dream and didn't really happen. So every time I walk by it I have to stick my head in just to make sure the pretty paper is still there. 


Avert your eyes!! Yep that is still the state of guest room 2. It's scary I know. The corgi's think it is their personal obstacle course so at least half the house likes it? One day we might finally paint. Or put some things away, or add furniture. You know. 


Hallway looking the other way. No good Columbia, SC girl's house is complete without a little Chicken Man art. 


Our master room. The fabric on the head board is just tucked for now. I used to have an orangey red fabric on there that went great in the rental, but I'm so over for our new place. Also, we need a bedskirt. 


The chair, the goat, and the blanket all have very special meaning to us/me (MLW isn't a huge fan of the goat) so it is nice that they have their own little corner. One of my wonderful friends knitted that blanket as a wedding gift. Probably the most beautiful and sentimental gift I have ever or will ever recive. Its pretty unreal in person and I feel lucky to have such super friends. 


View from the opposite corner of the room. Still in love with those closet doors! 


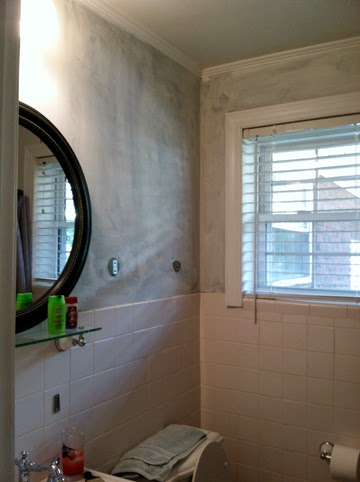
Finally, the master bath. I really should have added this to my finished list project post. The decor is pretty much done, but I still need to paint the ceiling and door. It was the last room we painted when we did the marathon day of trim and doors anndd we ran out of paint.

There you have it. 5054 got some new pep in her step.


Tuesday, October 22, 2013

The "Done" List

I've made a few promises for finished project updates and I'm here to report, they are finished!
-DIY x-benches
-Guest Bath
-Den side of the man room
-Guest room 1
And as I'm writing this another major home update is happening right above my head. Yep, I'm getting a new roof. Not really decorating fun, but still completely necessary, and another item I can check off my finished list.
First up, the x bench(s):


They are finished and I'm oh so happy. So is Ernie, they are his personal jump up on the bed benches. Now if I could only find a bedskirt and finish the headboard and we would be cookin'. 


Guest Bath,? Oh yeah! I still need to add a few nicknacks on the shelf above the sink, but overall it is done! (Don't you love the bath mat? Its from h&m and cost like $6-crazy)


I had to give ya'll a close up of the hedgehog print. I found it in a little town Broadway while on my UK adventure. Every bathroom needs a woodland creature or two. 


The complete Den side of the man room. A few more lights needed, but its a functioning room! 


I know I already did a post on the guest room, but a complete list is a complete list. 

And there you have it. I'm planning on giving ya'll a full house tour later this week to see some rooms that are half done, and no way near done. The house overall has come a long way though. It feels pretty good to see that sweat equity paying off! 


Friday, October 18, 2013

Grandma's Wallpaper

If you have been reading along with this little blog, you will know that I intended to put this wallpaper from Anthropologie in my guest bathroom. Trick was it was little expensive so I wanted to wait for an Anthro Day before pouncing on it. Well Anthro Day happened and this perfectly patterned wallpaper showed up at my house!
And then it sat around for a few weeks. To be honest I was sorta afraid of it. I've never wallpapered and I can't cut straight lines. A few youtube tutorials later and a pep talk from my MIL and I was game.
Then our sewage exploded out of the guest bath tub. Major plumbing fail. Luckily I have some AMAZING neighbors/friends that fixed that right up.
So wallpapering was back on track and of course here are my steps:


First step happened right when we first moved in. Prime those walls to get rid of smokey. Most wallpapers suggest priming before wallpapering anyway to this worked out well. We just had to look at it for about 3 months...


Step 2 was to spackle and smooth any wall imperfections. 


Sometimes a DYI cocktail are in order. I let the spackle dry over night and then sanded everything to a nice smooth surface. I also wiped the walls down with a damp cloth to make sure any dust was gone.


Tools of the trade. Lowe's sells a wallpaper kit with useful tools like a seam roller and smooth edge to get any air bubbles out. Scissors and measuring tape, level, exacto knife and pen rounded out the supplies list. 


The wallpaper came with instructions, but they made no sense to me until I watched the videos on youtube. I'm a visual learner. So anyway, first you measure the width of your paper. 


Next select your first corner and measure 1-2 inches shorter than the paper and mark it. This is because you want your paper to wrap around the corner. Seams in corner= bad. 


Take your level and trace a plum line with the mark you just made. Make sure everything is nice and straight. 


Plum line. Thank goodness for levels because straight lines really aren't my thing. 


Next measure the length of the wall you are going to paper. 


And measure your paper, adding about 4 inches for overhang on the top of the wall and the bottom. Then take your scissors and cut it! Its a good idea to have two strips of paper cut at one time. That way you can use the previous piece to make sure the lines will match up. You want the patterned to be consistent and sometimes you have to cut your piece a little shorter or longer to make that happen. 


Roll your paper up, back side out. I filled the bathtub up with warm water as suggested by the directions the paper came with. Then I submerged the paper for 30 seconds to activate the paste. I was lucky as this wallpaper came pre-pasted, but I would imagine this is where you would slap some paste on the back of it? Who knows. 


Take your paper out of the tub. I let mine drip dry a little before moving it up and onto the wall. I left more overhang on the bottom, but gave myself about an inch on the top to clean up with my exacto knife. 


Start smoothing that puppy out! I started at the top and worked my way down and into the corner. Really make sure that corner adheres nice and tight. I had paste flying as all the excess came out. Then repeat, cutting around outlets and doorways with  the exacto knife. 


Two hours later and the last little piece was all that was left. It is almost more rewarding than painting. Instant pattern! 

Complete! It is so much fun to walk down our hallway and see this pop of pattern. I still have to rehang the mirror, light and towel bar, but I'm super pumped to have conquered the paper. MLW and I agree it totally looks like grandma wallpaper, but that really cool grandma who kept only the best vintage stuff laying around. I love it. 

Until next time! 

Wednesday, October 9, 2013

Color Capture

Benjamin Moore release their Color Collection 2014 and in it where some pretty new shades of green that put me back on the hunt for the color for guest room 2. This room is staying our junk room for now, but my Papa Bear is officially moving down to Charleston in December and bringing an extra bed for our guest room with him. I figured it's time to get the ball rolling so when the bed arrives we can throw the bedding on it and call it a done deal!
Back to Ben Moore though. So as I was trolling their website I noticed they had a note about an app called Color Capture. Say What!?! In essence you take a pic with your phone and then the app will match a color in the picture to a bm shade. So cool. Also where was this app about 3 months ago when I was in the thick of trying to pick paint colors!


Screen face of Color Capture app. The best part is that its free! 


You just take a photo and poof! I would recommend taking a photo on with the camera and then uploading it to the CC app. Otherwise if you leave the screen, you loose your original image. However, once you have picked one you can save it and use different categories.  
This is also the illusive Home Goods palm pillow. I'm building everything in guest room 2 around this pillow, but of course could only find one. Its actually a Tommy Bahama fabric, and lucky for me Jo-Ann's carries it! I plan on putting the single pillow on the bed, then getting extra fabric to make a couple of chair cushions. Guest room 2 is as big as our master so there is going to be plenty of room for some seating. 


This app is so cool. It picks the shade then gives you several that are close. You can move the shade picker around to get the different light and dark tones. 


So adding the new color CC found for me along with one I found from the 2014 newbies, I have a total of 5 paint samples for this one room. Three of them were nixed weeks ago for being to dark. 


The reject shades. Still pretty, but they would be the darkest in the house. I'm going for soft shades with undertones of grey to keep the house consistent and MLW and I agreed that these would be to much of an exclamation point. 


The new shades wet, the left is the CC apps pick "Spring Break" and the right is my pick "Van Alen Green."


And dry. This room gets most of its light in the morning and this was taken at mid-afternoon. I'm excited to see what they look like in better sun! 


After holding the pillow up against them, MLW and I are torn. I think I'm leaning towards Van Alen and MLW just wants to be on Spring Break.  Spring Break is still pretty dark to me so I'm not convinced just yet. I don't know if we are quite ready to paint again just yet so I might sit with these two samples and see how I feel about them in a few days. They are definitely muuuch better than the original 3 shades though. 


Oh yeah, then I found this book while taking MLW birthday bookshop shopping. Seriously. I needed this book. It was nice that a lot of the colors I picked are in here though. And its fun to flip through so the book came home. One day we will look back and reminisce about picking paint colors, right? 

Love ya'll!