And then it sat around for a few weeks. To be honest I was sorta afraid of it. I've never wallpapered and I can't cut straight lines. A few youtube tutorials later and a pep talk from my MIL and I was game.
Then our sewage exploded out of the guest bath tub. Major plumbing fail. Luckily I have some AMAZING neighbors/friends that fixed that right up.
So wallpapering was back on track and of course here are my steps:
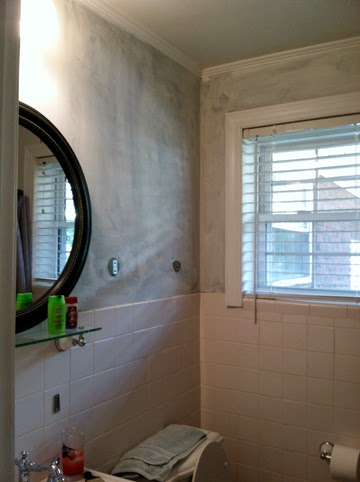
First step happened right when we first moved in. Prime those walls to get rid of smokey. Most wallpapers suggest priming before wallpapering anyway to this worked out well. We just had to look at it for about 3 months...

Step 2 was to spackle and smooth any wall imperfections.

Sometimes a DYI cocktail are in order. I let the spackle dry over night and then sanded everything to a nice smooth surface. I also wiped the walls down with a damp cloth to make sure any dust was gone.

Tools of the trade. Lowe's sells a wallpaper kit with useful tools like a seam roller and smooth edge to get any air bubbles out. Scissors and measuring tape, level, exacto knife and pen rounded out the supplies list.

The wallpaper came with instructions, but they made no sense to me until I watched the videos on youtube. I'm a visual learner. So anyway, first you measure the width of your paper.

Next select your first corner and measure 1-2 inches shorter than the paper and mark it. This is because you want your paper to wrap around the corner. Seams in corner= bad.

Take your level and trace a plum line with the mark you just made. Make sure everything is nice and straight.

Plum line. Thank goodness for levels because straight lines really aren't my thing.

Next measure the length of the wall you are going to paper.

And measure your paper, adding about 4 inches for overhang on the top of the wall and the bottom. Then take your scissors and cut it! Its a good idea to have two strips of paper cut at one time. That way you can use the previous piece to make sure the lines will match up. You want the patterned to be consistent and sometimes you have to cut your piece a little shorter or longer to make that happen.

Roll your paper up, back side out. I filled the bathtub up with warm water as suggested by the directions the paper came with. Then I submerged the paper for 30 seconds to activate the paste. I was lucky as this wallpaper came pre-pasted, but I would imagine this is where you would slap some paste on the back of it? Who knows.

Take your paper out of the tub. I let mine drip dry a little before moving it up and onto the wall. I left more overhang on the bottom, but gave myself about an inch on the top to clean up with my exacto knife.

Start smoothing that puppy out! I started at the top and worked my way down and into the corner. Really make sure that corner adheres nice and tight. I had paste flying as all the excess came out. Then repeat, cutting around outlets and doorways with the exacto knife.

Two hours later and the last little piece was all that was left. It is almost more rewarding than painting. Instant pattern!

Complete! It is so much fun to walk down our hallway and see this pop of pattern. I still have to rehang the mirror, light and towel bar, but I'm super pumped to have conquered the paper. MLW and I agree it totally looks like grandma wallpaper, but that really cool grandma who kept only the best vintage stuff laying around. I love it.
Until next time!

No comments:
Post a Comment